Story
Imagine the endless possibilities if we could make our standard CCTV Camera smarter and interactive.
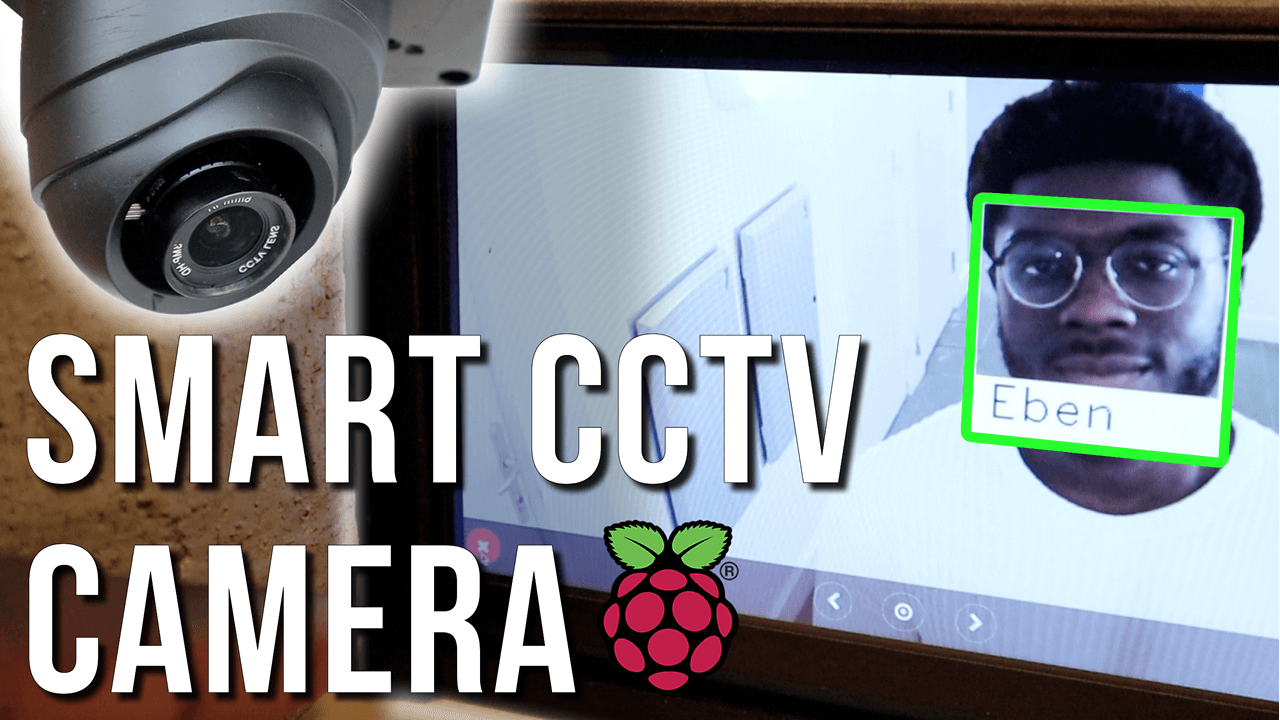
Well, introducing the Smart CCTV Camera. A Raspberry Pi IoT powered Smart CCTV camera featuring face recognition, home automation, and the ability to interact with your camera’s live stream. In essence, it’s more like a DIY Ring Camera.
The smart CCTV Camera keeps tabs on your valuable assets as well as informing you of its surroundings, whether you’re indoors or outdoors.
Taking advantage of the new Raspberry Pi High Quality Camera, the Smart CCTV Camera also features:
[su_note note_color=”#F5F5F5″ text_color=”#333333″ radius=”3″ class=”” id=””]
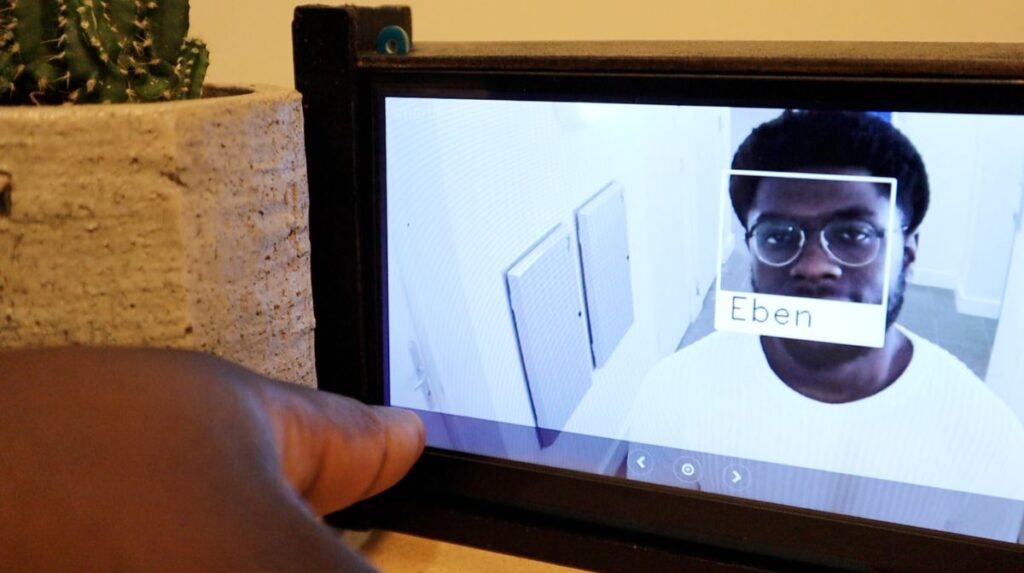
- Face Recognition – Identifying who’s at the door
- Camera Movement – Reach those blind spots a typical CCTV camera is limited to with a controllable servo motor.
- Smart Home Automation – Integrate with your Smart Appliances and Smart Plugs.
- Dedicated Camera Monitor Feed – Interact with who’s at the door
- Live Stream – Watch videos in Realtime
- Live Notifications – When not around, get a message at who’s at your door via email.
[/su_note]
Whether you place the SmartCCTV indoors or on your front porch this works as your intelligent watchdog camera.
The following article details how to build your own Smart CCTV camera using a Raspberry Pi with the new High-Quality Pi Camera – as well as its dedicated monitor. Let’s get started!
Pre-requisite: Raspberry Pi 4 (RAM 2GB+) Recommended.
Parts List – What you’ll need
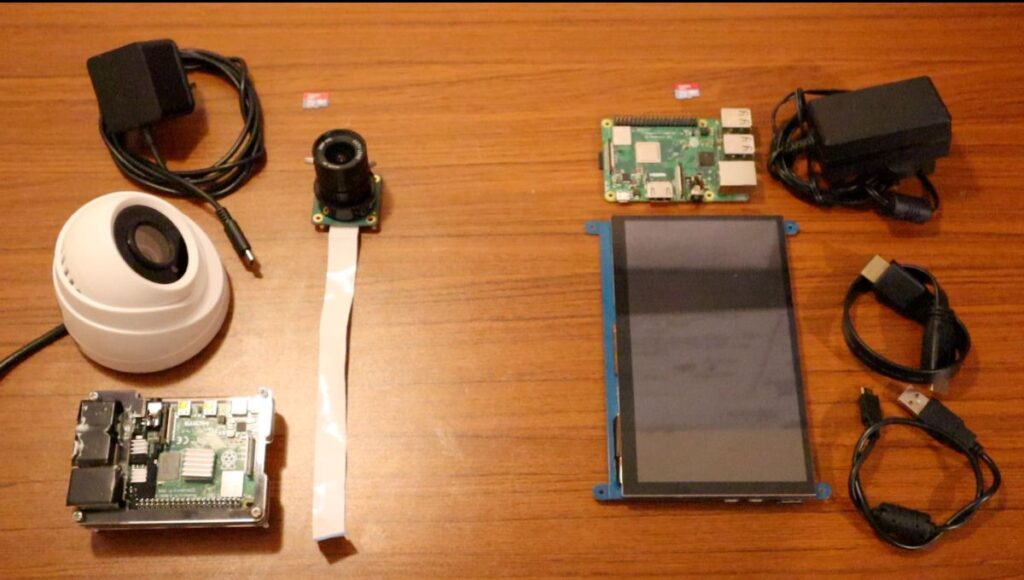
Main Parts (Hardware Components):
Amazon
TBC
TBC
Software and Platforms
- Open CV
- Python 3.7+ & Flask
- Face recognition and dlib
Hardware Materials:
- Fiberboard wood
- Hacksaw
Costs: The total project cost ~$180 dollars, however with a bit of research you can bring this price down. You could also make a cost-effective version using the standard Pi Camera module V2. View the video on the comparison of the two Pi Camera modules.
How it Works:
The smart CCTV work by capturing live footage from the camera build and using Flask to create the live stream for our client devices to view the stream. Flask is a lightweight micro web framework which is a great bridge between Python and HTML Web pages. This makes it ideal for touch screen interaction.
Devices connected to the same network of the Pi (CCTV Camera) would be able to visit the URL and see the live footage of the stream. OpenCV would be used to access our video stream. Finally, we would use a face recognition library to identify users.
Assembly of Parts:
The assembly of parts is broken into two sections:
- Camera Build
- Dedicated Display Monitor
Camera Build
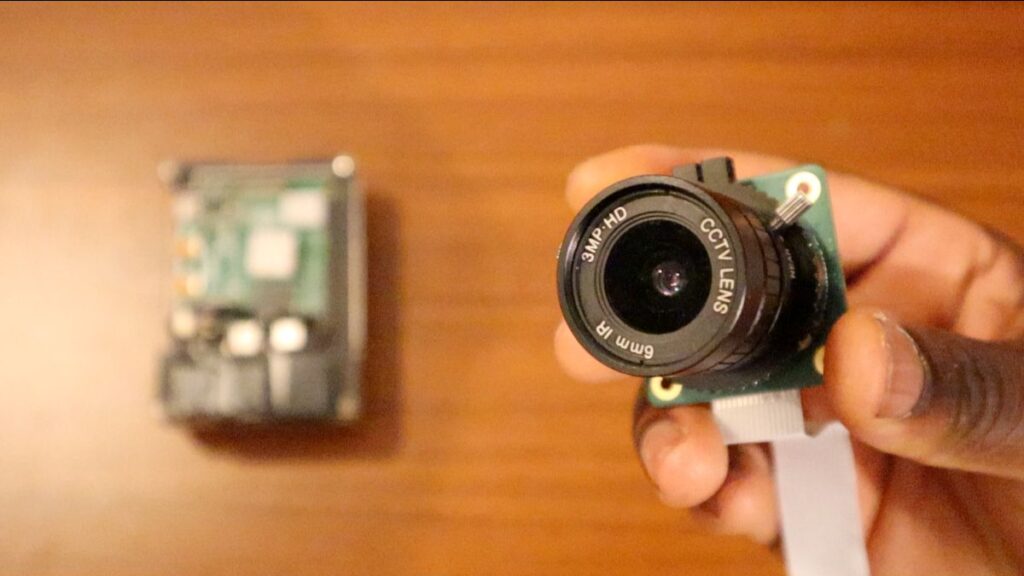
The camera build consists of a Raspberry Pi 4, micro SD card, Pi High-Quality Camera, and a Plastic Dome Camera Enclosure. The Raspberry Pi is powered by a USB-C Power Supply. In essence, this is all you need to complete the build is a Pi and Pi Camera module.
Similar to the Raspberry Pi V2 Camera module the High Quality Pi Camera module ribbon cable is inserted into the Camera Port of the Pi.
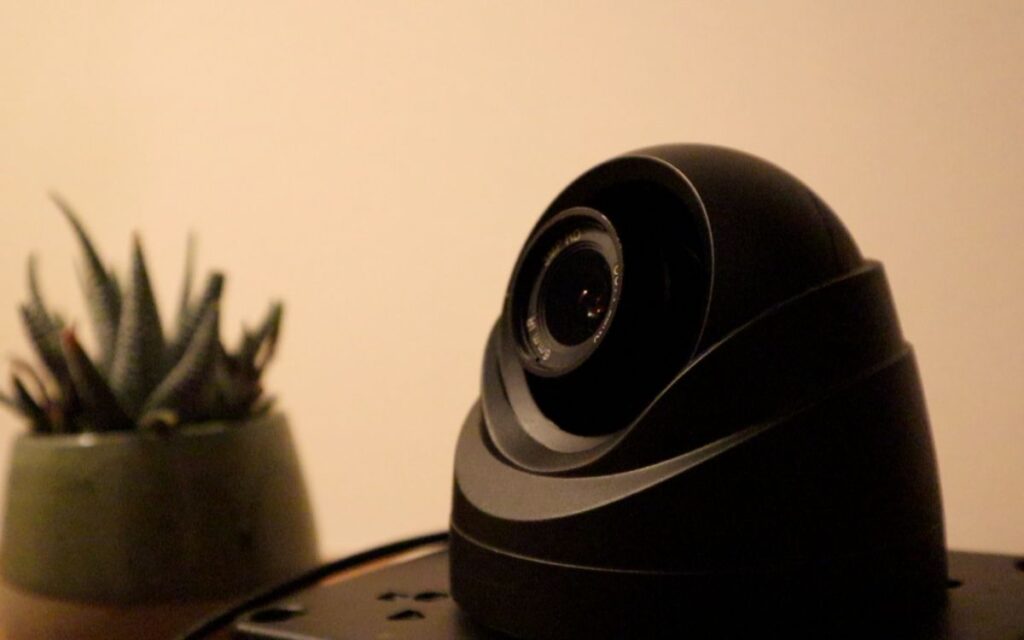
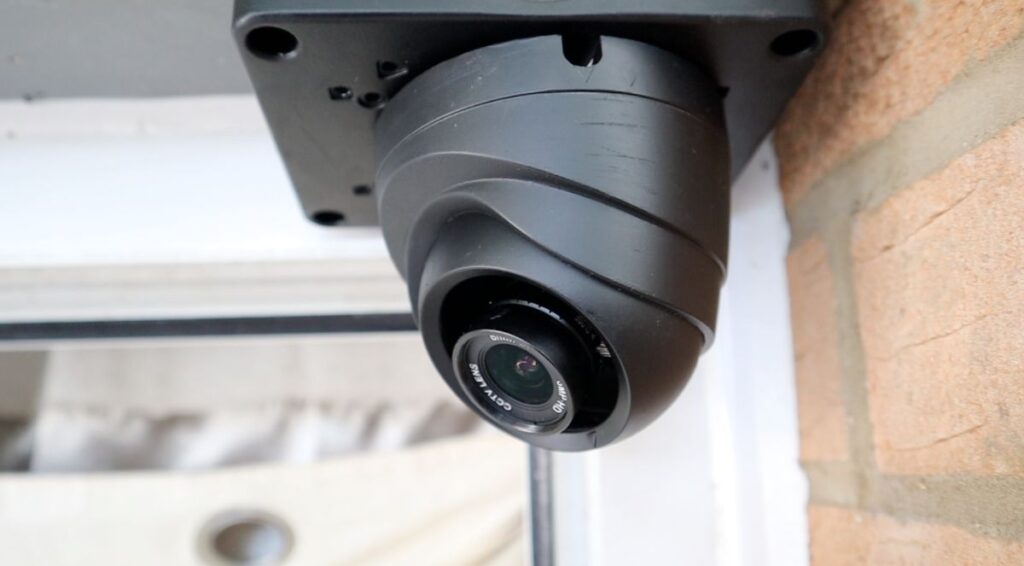
CCTV Camera Enclosure (Optional)
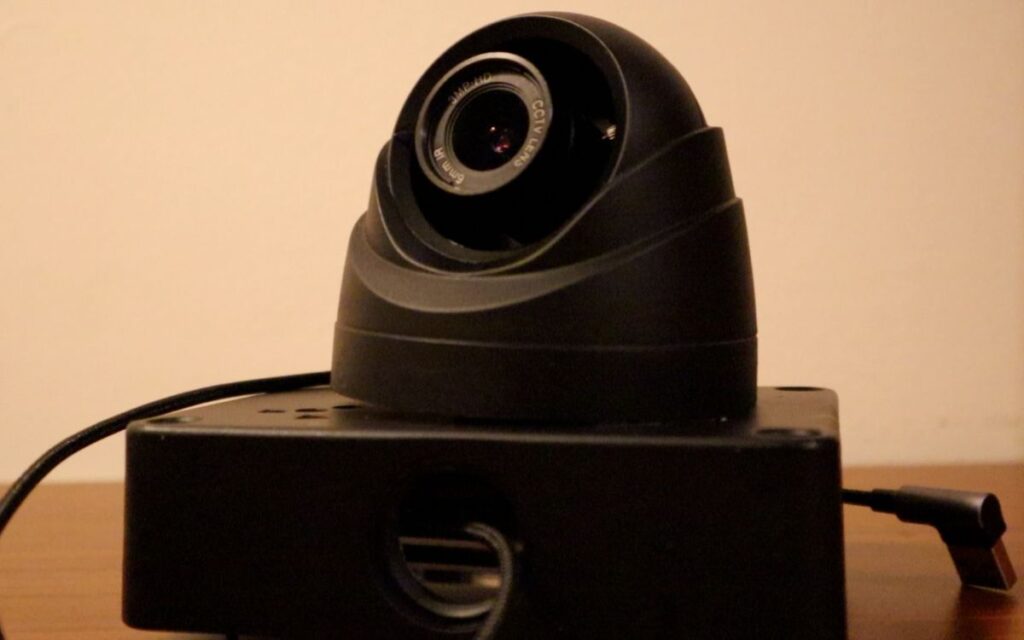
The CCTV camera enclosure was made by stripping out a cheap plastic dome CCTV camera and using the plastic camera Chassis as the enclosure. Finding a CCTV enclosure is optional, however, this does help with the aesthetics. The original color of the camera came in white, the camera and enclosure were then spray painted to a matte black finish – which helped give it a stealthy look.
Servo Motor Implementation:
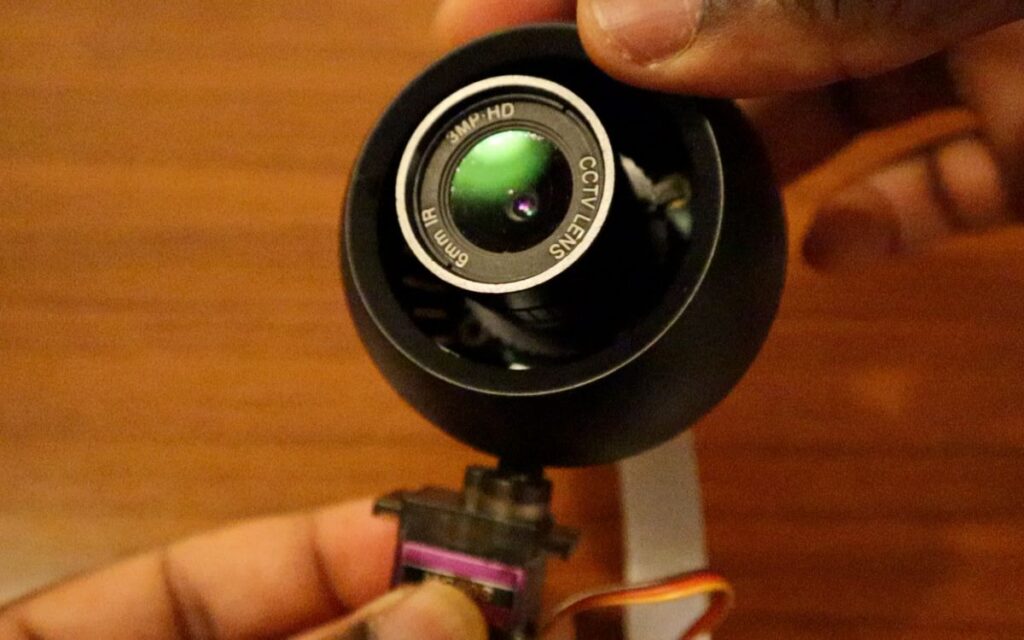
The Smart CCTV camera won’t be as ‘smart’ if we can’t interact with it.
The question is how can we interact with the CCTV camera to make it move into known blind spots?
This is where a servo motor comes into the picture. Servo Motors are really great for precision. The MG90S servo motor allows for a full 180-degree rotation which is ideal for a camera mounted to a wall.
To mount the servo motor we would strip the wires and solder female header pins to plug into the GPIO pin of the raspberry Pi header.
[su_note note_color=”#F5F5F5″ text_color=”#333333″ radius=”3″ class=”” id=””]
Note: These would be programmed in the software section and can be re-programmed in the servo.py file.
[/su_note]
The following configuration.
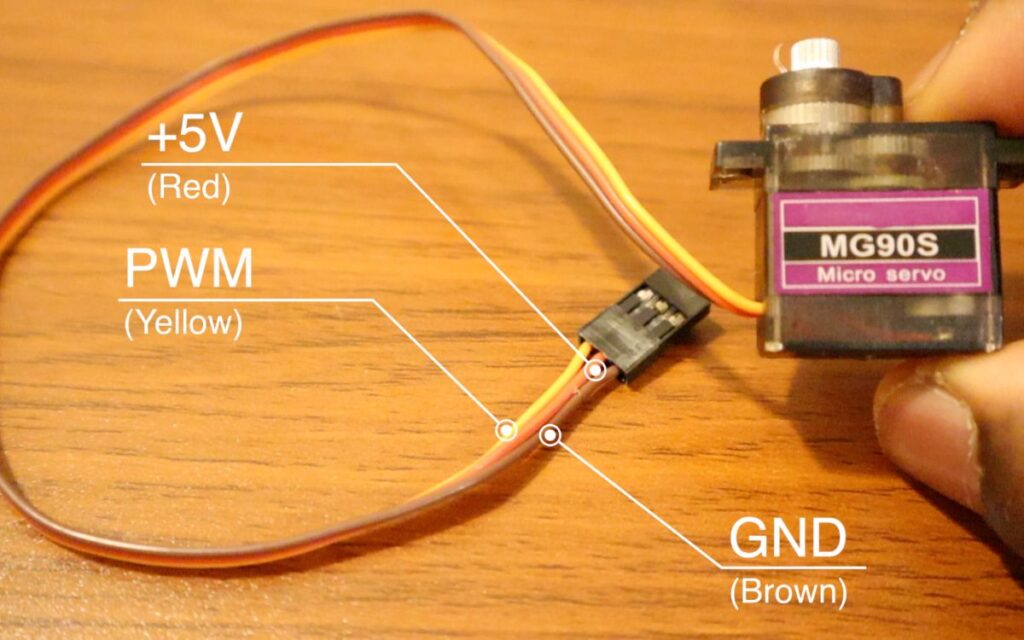
| Servo Wire Colour | Function | Pi 4 GPIO Pins |
| Red | +5V | Pin 2 |
| Brown | GND | Pin 6 |
| Orange | PWM | Pin 11 |
A hole can be drilled into the Camera Chassis to screw the motor in – enabling the camera to rotate when the servo rotates. Once completed, re-assemble your Smart CCTV back together.
[su_note note_color=”#F5F5F5″ text_color=”#333333″ radius=”3″ class=”” id=””]
Note: A camera enclosure was used to house the Raspberry Pi. Keep in mind to build an enclosure that has some form of ventilation to prevent the Pi from getting warm overtime.
[/su_note]
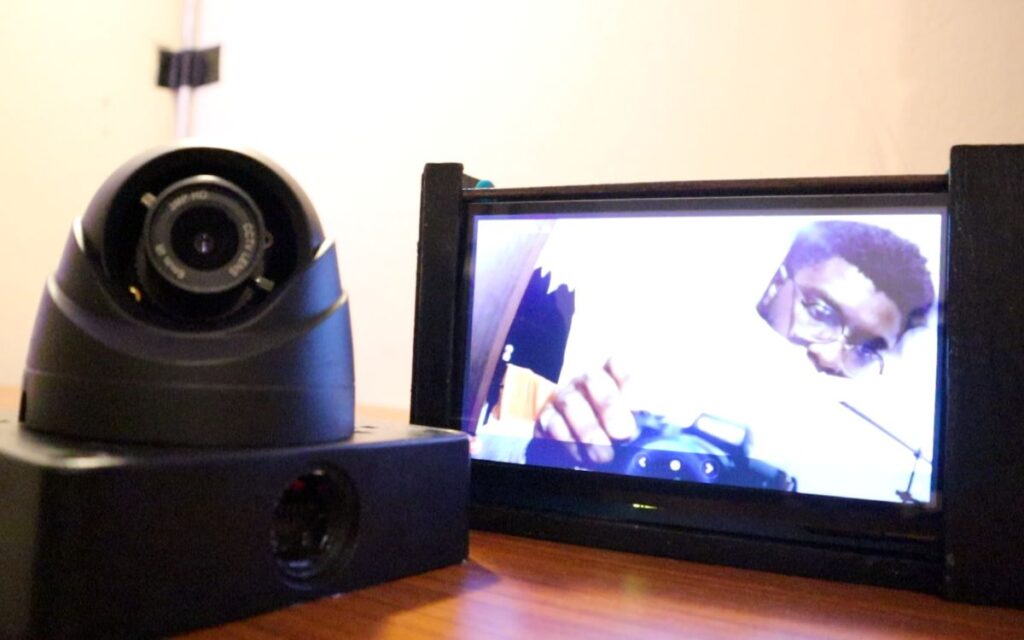
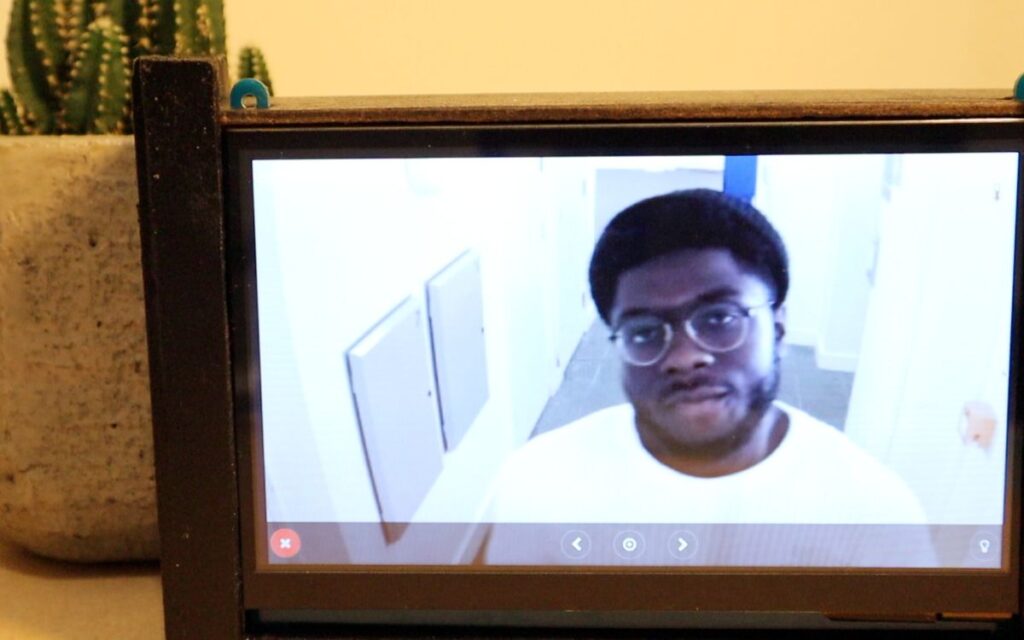
Dedicated Monitor Display:
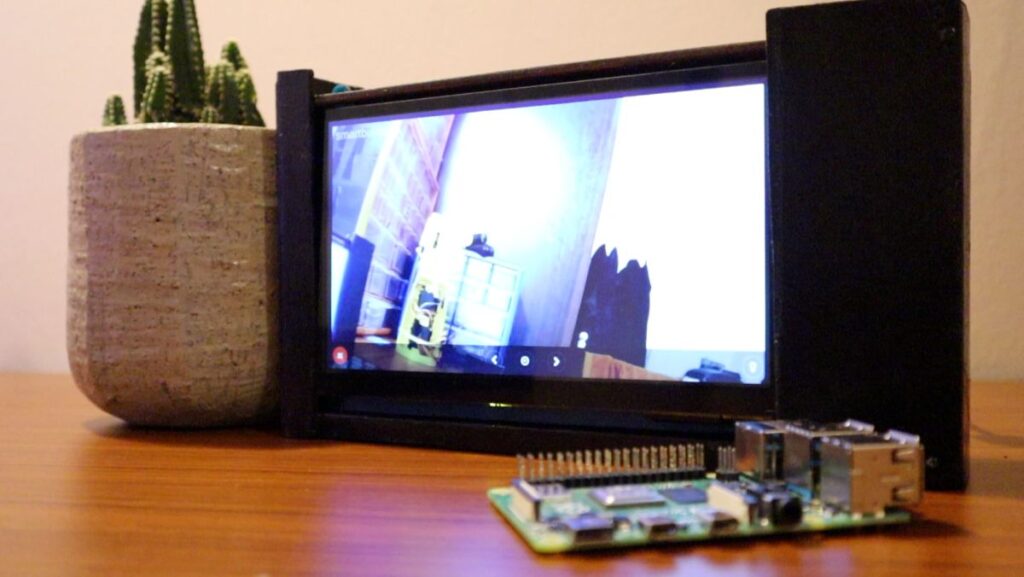
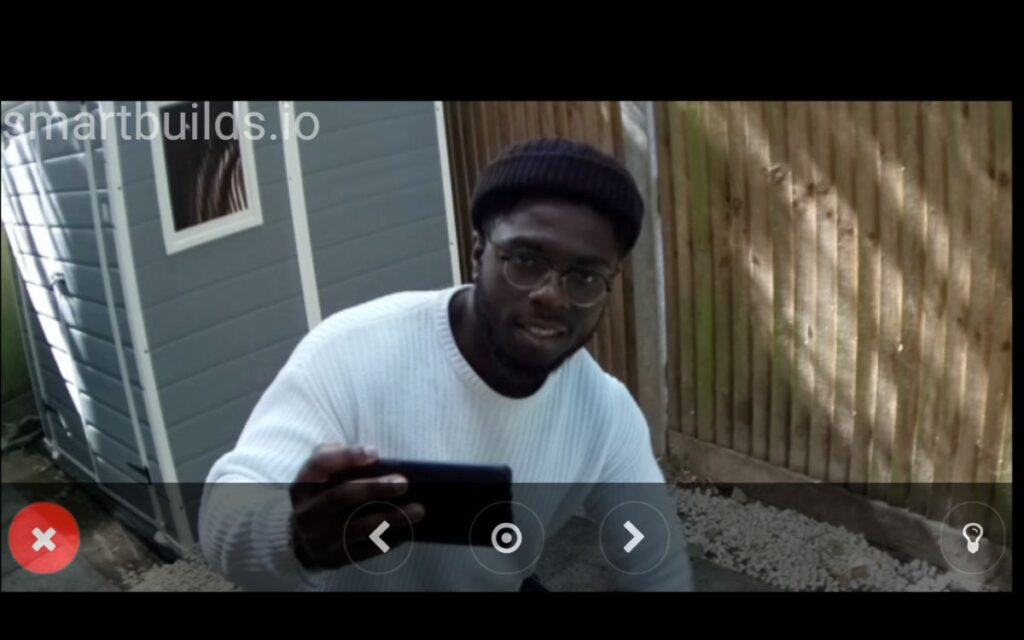
The Smart CCTV camera live stream can be accessed from any smartphone via Web URL. However, for the times we want to view the live stream at that immediate instant without pulling out our phones every time, a dedicated touchscreen display monitor would be practical. This Interactive display monitor indefinitely shows the live stream, as well as you can interact with the camera moving left and right.

The Dedicated touchscreen monitor frame was assembled using 1×4 MDF Fiberboard wood which can be found at your local DIY store. Using a hacksaw, the wood was used to cut to the exact dimensions of 13 H cm x 22.5 W cm x 4.5 D cm. The frame was then assembled and was held together with PVA glue and nails. In addition, a glossy Black finish was applied, giving a modern aesthetic look that can blend on your bookshelf.
Great! We’re on the Software part. Now the next part is installing face recognition and the dlib library.
Software
Setup of Pi Camera Module
Having flashed the latest Raspbian OS onto your Micro SD, and completed the setup of Pi. The next part involves installing the face recognition & dib library to the camera build Raspbian OS.
[su_note note_color=”#F5F5F5″ text_color=”#333333″ radius=”3″ class=”” id=””]
Note: This was installed on the Raspbian OS release May 2020.
[/su_note]
After logging in via VNC and completing the Pi OS Setup Wizard. We’re going to enable the Pi Camera Port ports.
- The Smart CCTV uses the Pi Camera Module. Firstly, ensure that the camera port is enabled.
Open the terminal window and run:
sudo rasp-config
Select Interface Options, Camera Port and select Enabled. You can now exit. This may cause your Pi to reboot.
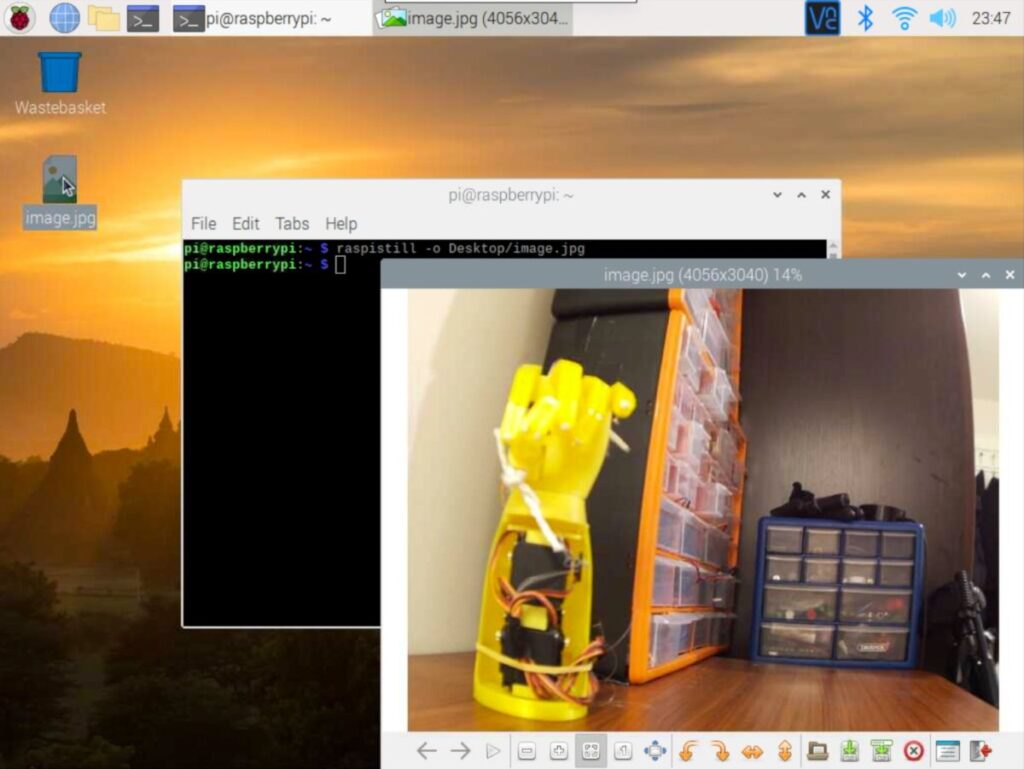
You can make sure that the camera module is all working well by taking a picture via the Pi camera module by running this in the below terminal command:
raspistill -o Desktop/image.jpg
This would save a picture of what your camera is viewing to the desktop as image.jpg. You can view the image.
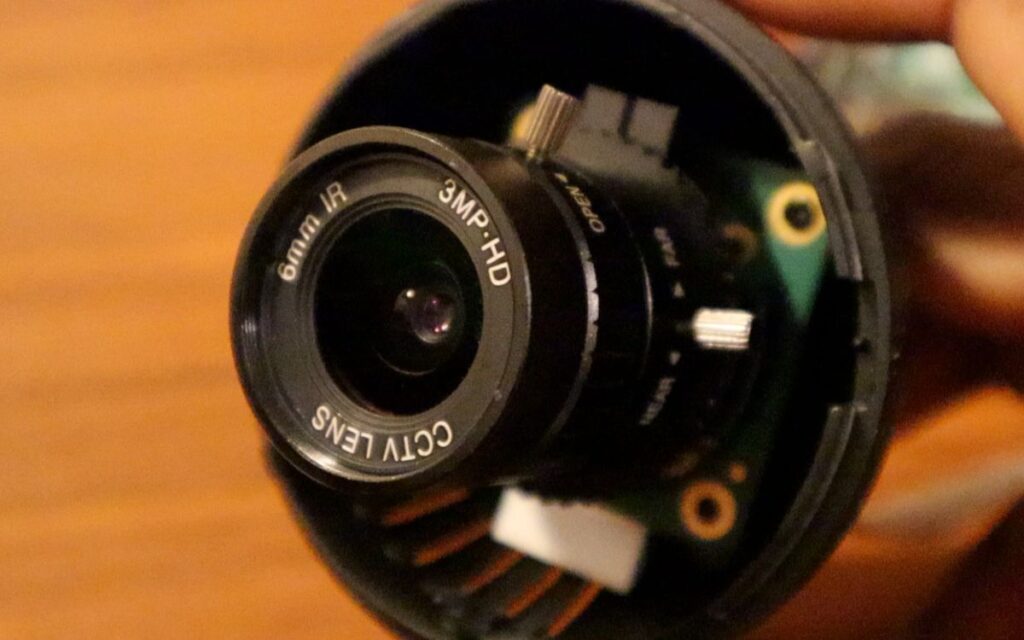
Note: If you’re using the Pi HQ camera you may need to adjust your lens if the picture is too blurry.
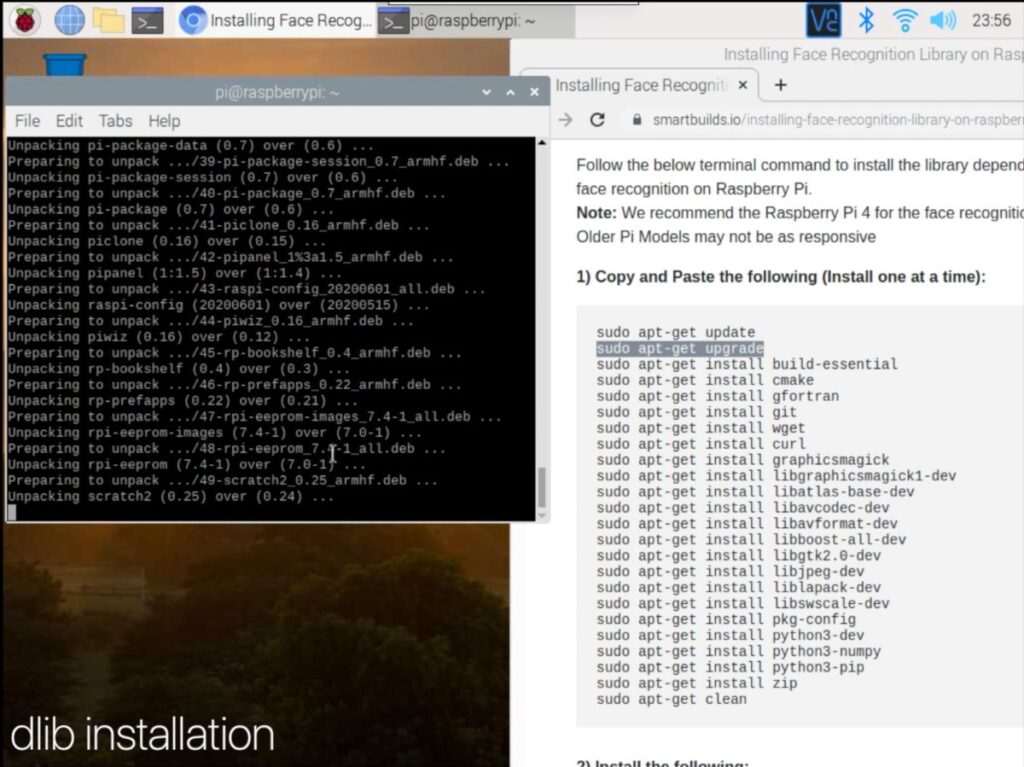
Face Recognition & dlib Installation
The Smart CCTV camera relies on a few dependencies that are required to be installed before running the lives stream. The dlib library is a pre-requisite to start using the face recognition library. Visit the Smartbuilds.io for the terminal commands library dependencies for face recognition. Copy and paste the library commands to install the dlib library. (This also, including face recognition).
Note: The process took about ~40 minutes on the Raspberry Pi 4 (4 GB), but can take several hours on other Pi models. If unsure of the installation, you can also refer to the video tutorial.
Smart CCTV Git Installation
Once the dlib library and face recognition is installed you can now clone the Smart CCTV Git Repo. This repository contains Flask to establish live streams from Pi to other devices connected to the network.
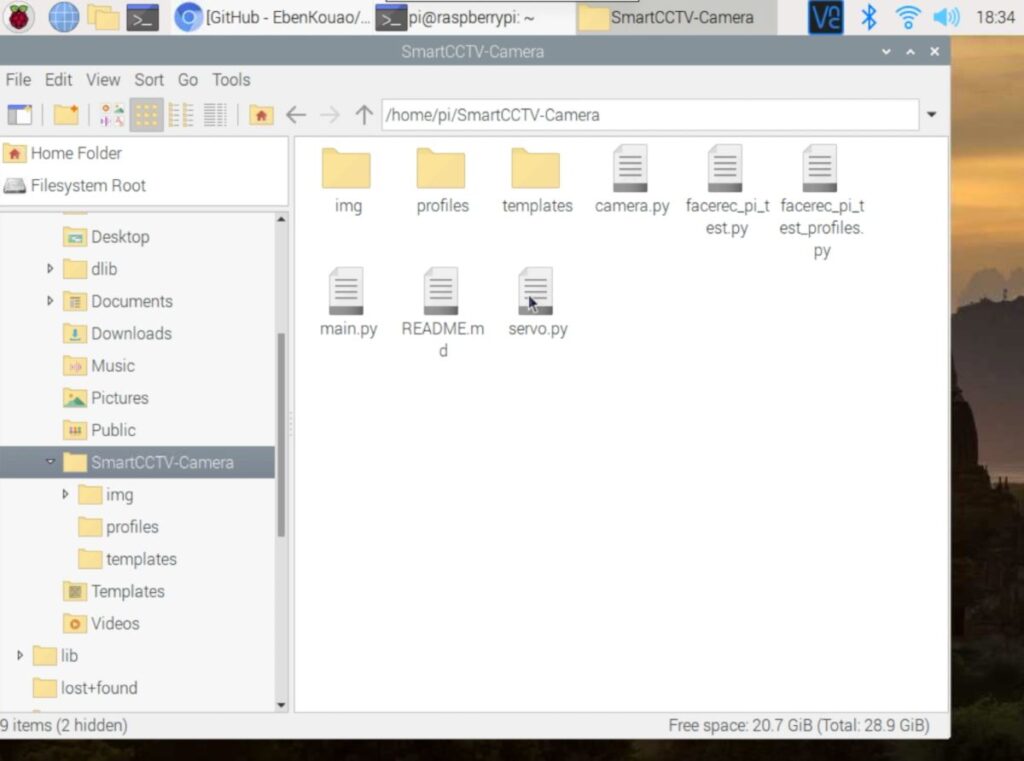
- Breakdown of files in the Smart CCTV repo
- Profile Folder – Where all Face recognition profiles are stored.
- Templates Folder – This is where the HTML webpage would be stored
- Python script:
- Camera.py – The script access open CV and the face recognition library to identify persons from its encoding matrix.
- main.py – Where the Flask stream is created – importing servo.py and camera.py
- Servo.py – This python script controls the servo motor rotating the Smart CCTV in the location desired. (Left or Right)
- Demo Python Scripts:
- facerec_pi_test.py – Test script to detect faces
- face_pi_test_profiles.py – Test script to detect multiple faces.
To access the live stream with face recognition run main.py. You can start your live stream by visiting the IP address of your Pi on a browser connected to the same network. The address can be found by entering ifconfig in the terminal of the Pi.
Visit the URL on your browser: <your_pi_ip>:5000 to view your stream. (5000 being your port number)
Via the Livestream, you can now interact with your camera by rotating the camera to cover your blinds spots. Moreover, you can add additional functionalities such as light control. (That’s a whole other topic).
How to add a profile to the face recognition:
- Adding a profile is as simple as placing your ‘passport-style’ in the Profiles folder as a .png file.
How the Face Recognition Library works
- The camera script encodes the following face into a matrix to be matched against via the face recognition library. The script then performs a comparison of the face it sees relative to the current frame of the camera stream. (This uses the same library as the Smart Mirror Face ID Module)
[su_note note_color=”#F5F5F5″ text_color=”#333333″ radius=”3″ class=”” id=””]
Note: Picture size 100kb max – The smaller the picture is the faster the face recognition feature performs.
[/su_note]
If you have any questions, leave a comment below or watch the full tutorial video.
Next Steps:
There you have it, your own SmartCCTV camera. If you like this project, feel free to leave comments /contribute and develop the SmartCCTV repo. You can now program the camera to theoretically perform any action based on an intent (being face recognition). Think of IR LEDs, night vision smart locks… the possibilities are endless!
[su_note note_color=”#F5F5F5″ text_color=”#333333″ radius=”3″ class=”” id=””]
If you would like to support this project, consider supporting my Patreon page.
Alternatively:
[/su_note]
I love this project, well done! is is possible to add more than one camera? and would autotrack be a possibility?
Hi Vwsurfer,
Absoultuey, would require a bit of programming to add an additional camera. Autotrack is also possible.
If you do develop this, I would be interested to see how this turn out.
P.S. Next release is a DIY Skateboard – faster than a boosted board.
Eben.
Is there a possibility for a feature that the camera will send an image to the email of the owner of the house if he/she is not around? We would want to add that feature when there is an unknown person outside the door 😀
Great project btw! Thank you!
Hi Jugo,
Definitely possible, I decided to remove this feature out, however, here’s an example that goes through it quite well.
https://github.com/HackerShackOfficial/Smart-Security-Camera in mail.py
Hello Eben!
This was an amazing build! I had a question about the facial recognition program. Is there a way for the user to update the profiles in the raspberry pi without accessing the device every time? For example, if you have this camera at your front door and it detects someone as unknown, but it is someone who frequently comes to your home, would you need to ask them for a picture and manually upload the pictures into the raspberry pi or is there a way to just update the profiles using the photo that the camera took? This way, you can use your phone to update the name of the person the first time they come so that the next time they come, the camera will identify it.
Hi Eshwar,
This sounds like a good approach, this is possible. If I understand correctly. (this may even need a bit of ML). However, the git repo doesn’t support this functionality. If you do implement this, feel free to contribute to the git.
hey i tried to do this project ! it works but the stream is so laggy
Hey Banar, good to hear.
What Pi are you working with, also does the same lag occur when the face recognition model is off?
Cheers.
Is there a way to record the video to rotating mp4 files? I’ve been doing some googling, but have not found any instructions yet….
This is possible, you’ll possibly need to create some server to record the stream. But this GitHub repo doesn’t go into this detail.
If you do implement it, do contribute to the Git.
Hi jugo,
Really it is amazing……….want to know can we built a camera with LAN port so that we can use it in existing infrastructure, also tell me how can we store all data in to a particular server so that their is no need for individual SD card….also plan for camera wise view so that a security person can monitor all the cameras from one place………..
Hi Pradeep,
Yep, that it possible, and sounds like a good idea!
However, this project doesn’t go into, but if you do work on streaming saving files to a server. Please do let me know/contribute to the Git repo.
Thank you dir this good description. But is it possible to run this project with an usb webcam?
Yep, you can check the Git Repo which gives an example of implementing a USB camera peripheral camera. Good luck!
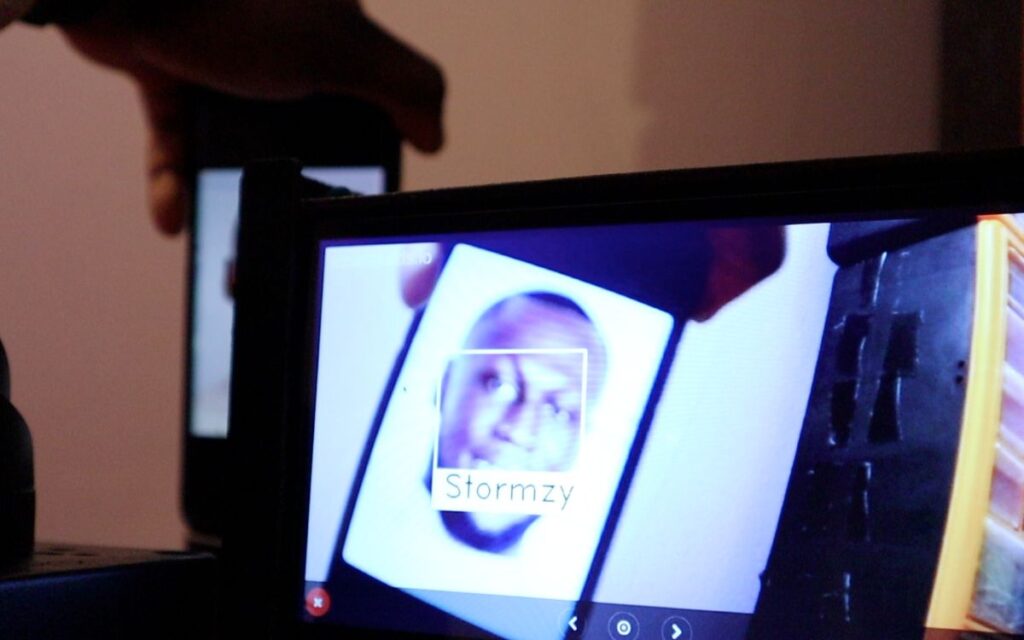
Hey, I think the face recognition might be a bit faulty considering it recognizes face by other people’s name. For example, when I show a picture of Elon Musk, it will recognizes as Bella Hadid. When I show a picture of Stormzy, it will says “.DS_Store”. I have tried your project and it worked perfectly, but I had to “reset” everything since my raspberry pi is out of storage. Now, when I run the programs, it seems like it could not recognize faces according to the correct name. Is there any way to resolve this?
Before I forgot to mention, I have followed every steps that you carefully written in the instruction.
My python version is 3.7.3, cv2 version is 3.4.6
Hi Marissa,
Sounds a bit off.
Could you try a fresh re-install, also remove.DS store. (Not needed)
Also, face recognition is dependant on your camera quality. Assuming this is fine. Please try a fresh re-install.
Good luck
Hi, Very nice project, My only question is, how can we flip the image, I tried using cv2.flip(1) but it still have the video reverse. could you help me with that ?Thanks and congrats
Hi Pierre,
Looking at OpenCV, could you specify with the two arguments: image = cv2.flip(src, 0).
https://www.geeksforgeeks.org/python-opencv-cv2-flip-method.
Cheers
Hey,
This is a really nice project, I tried to implement it on a raspberry pi 3 but I got some problems.
1. When I tried to run the main.py using “sudo python3 /home/pi/SmartCCTV-Camera/main.py”, I got the message that there is no face_recognition module ->
” ModuleNotFoundError: No module named ‘face_recognition’ ” ( i followed every step from this tutorial https://smartbuilds.io/installing-face-recognition-library-on-raspberry-pi-4/ and everything is updated and installed. )
2. If I try to run the main using only “python3 /home/pi/SmartCCTV-Camera/main.py” I no longer getting the no face_recognition module error but it tells me that it can’t find the profiles directory -> ” FileNotFoundError: [Errno 2] No such file or directory: ‘profiles’ ”
3. If I use ” cd to /home/pi/SmartCCTV-Camera ” and after that, I run ” python3 main.py ” the streaming is laggy, but the face recognition is fast. When I get near the camera it immediately distinguished me but the frame rate is slow and delayed.
Can you please give me some advice on improving the frame rate or all of this is happening because I use raspberry 3?
Hi Alin,
If I try to run the main using only “python3 /home/pi/SmartCCTV-Camera/main.py” I no longer getting the no face_recognition module error but it tells me that it can’t find the profiles directory -> ” FileNotFoundError: [Errno 2] No such file or directory: ‘profiles’ ” – Looks like you’ll need to create profile folder. It may also be pointing at the wrong path. Try printing out the absolute file path.
Improving the frame rate would require some optimization of the model. If you really want to increase the frame rate, I would recommend running this on a Raspberry Pi 4.
Good luck!